Today, maps are a basic component of most mobile applications. Integrating maps can improve the user experience, whether it is for showcasing different points of interest, providing directions, or displaying locations.
Why Use Maps in a React Native App?
A flexible tool for giving customers location-based functionality is a map. Typical use cases consist of the following:
User Location Display: Travel and fitness applications can benefit from the ability to display the user's current location on a map.
Displaying Points of Interest: Maps can show nearby destinations and provide navigation if your app works with dining establishments, tourism sites, or other services.
Driving Directions: As an extra feature, map integrations can provide users with routes and directions.
Real-Time Tracking: Maps provide location information and real-time updates for tracking persons, cars, and deliveries.
React Native developers can quickly and easily build these functionalities with react-native-maps.
Step 1: Install React Native Maps
Installing the react-native-maps package is the first step towards utilizing maps in your React Native application. The following command can be used to start a new project if one isn't already set up:
npm install react-native-maps
Or, if you are using yarn package manager:
yarn add react-native-maps
Lastly, we have to link the native packages:
npx pod-install
In React Native 0.60+ the CLI autolink feature links the module while building the app.
The setup step is made considerably simpler for Expo users because Expo comes pre-configured with support for react-native-maps. To install the software using Expo, just run the following command:
npx expo install react-native-maps
Step 2: Configure Maps
Android configuration
To enable the Google Maps SDK for Android, open the Google Cloud Console, start a new project, and generate a new API key for Google Maps SDK.
Next, open the android/app/src/main/AndroidManifest.xml file in your Android project and add the following to the <application> tag:
<manifest
  xmlns:android="http://schemas.android.com/apk/res/android"
  package="com.yourapp"
>
  <application>
    <meta-data
      android:name="com.google.android.geo.API_KEY"
      android:value="YOUR_GOOGLE_MAPS_API_KEY_HERE"
    />
  </application>
  <uses-permission android:name="android.permission.ACCESS_FINE_LOCATION" />
  <uses-permission android:name="android.permission.ACCESS_COARSE_LOCATION" />
</manifest>
iOS configuration (optional)
Apple Maps is natively supported on iOS, thus no API key is needed if you're working for that platform.
If you want to use Google Maps, update your AppDelegate.m(m) file to include the Google Maps API key from the previous step.
#import <GoogleMaps/GoogleMaps.h>

- (BOOL)application:(UIApplication *)application didFinishLaunchingWithOptions:(NSDictionary *)launchOptions
{
  [GMSServices provideAPIKey:@"_YOUR_API_KEY_"]; // <- Add this line
}
With iOS configurations complete, let’s move to code integration for react native maps.
Step 3: Displaying the Map
After setting up your environment, let's see how to display a map in your React Native application.

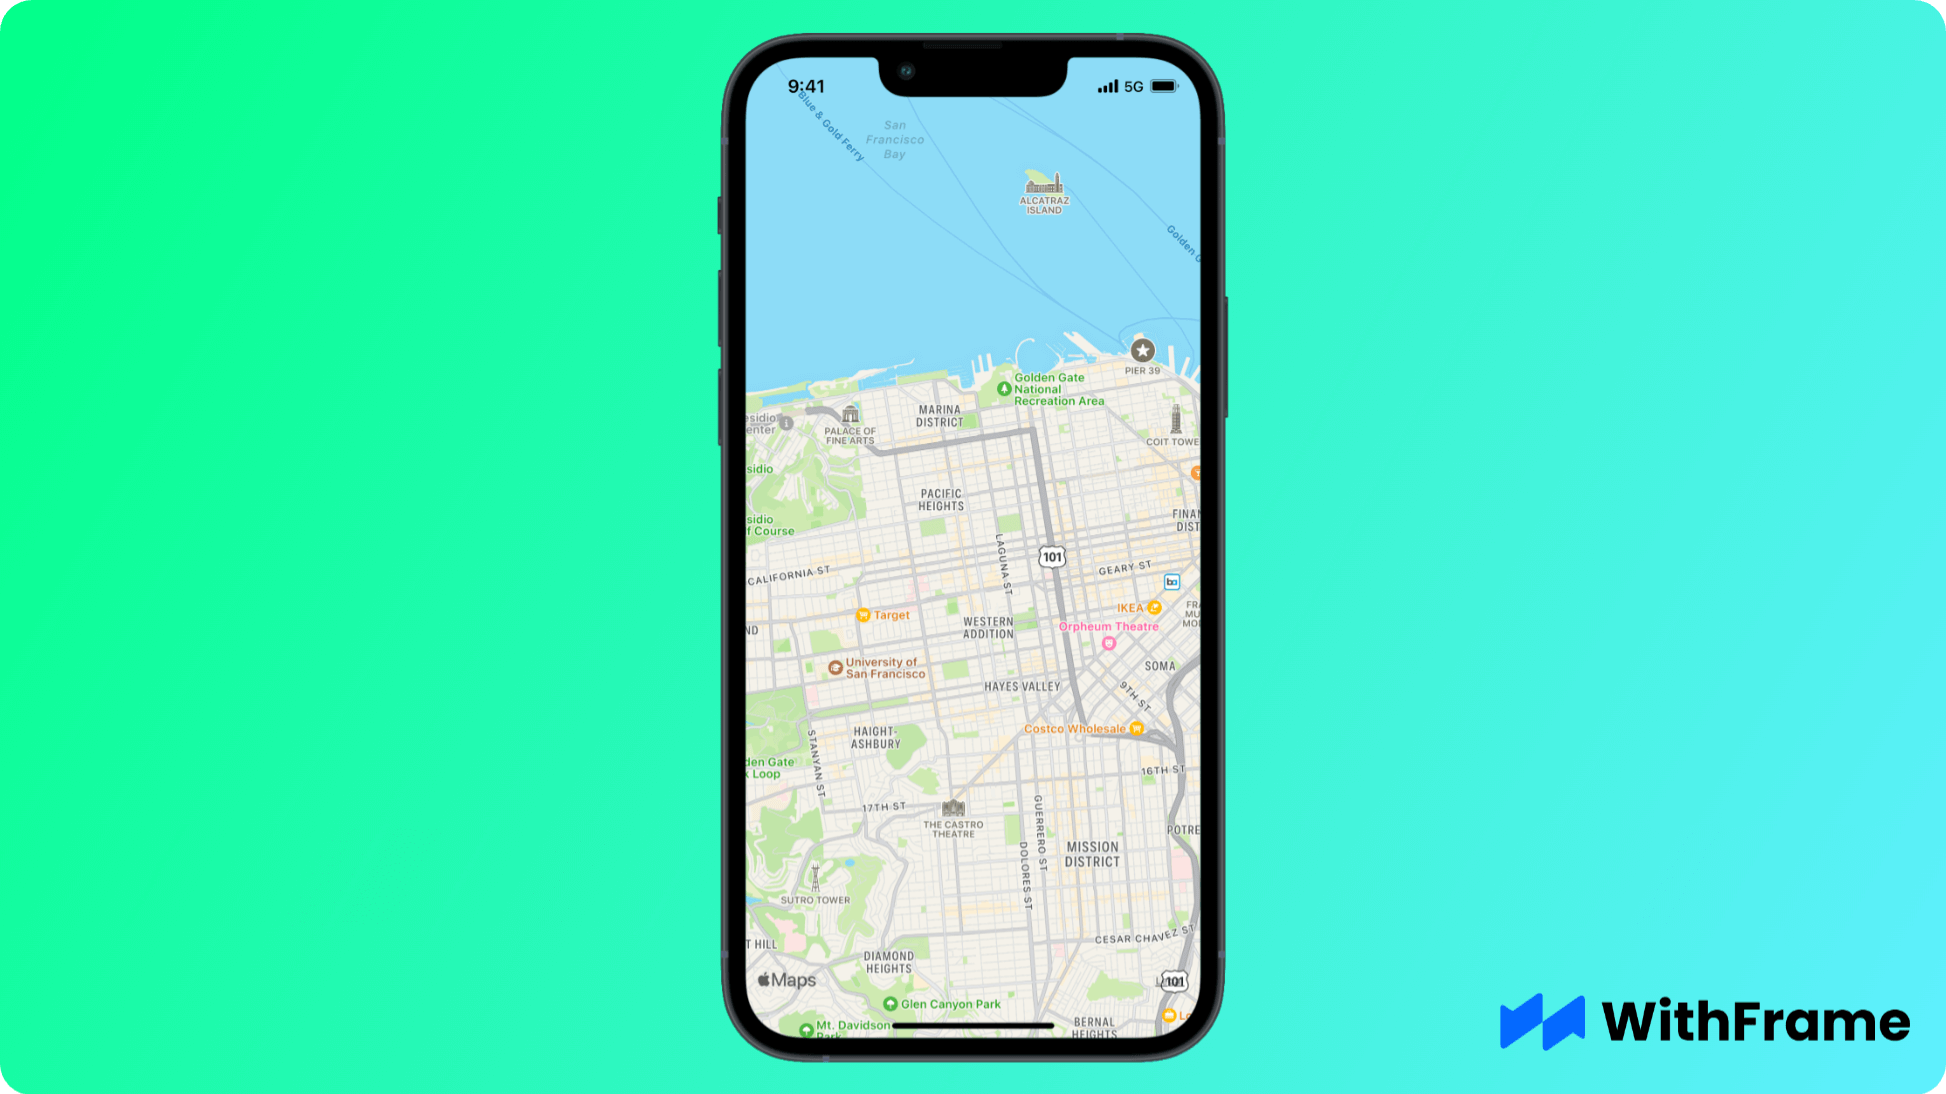
Import the default MapView component from the react-native-maps package and render it inside your component. Add flex: 1 to make the map view full screen.
import React from "react";
import MapView from "react-native-maps";
import { StyleSheet, View } from "react-native";

export default function Example() {
  return (
    <View style={{ flex: 1 }}>
      <MapView
        style={{ flex: 1 }}
        initialRegion={{
          latitude: 37.78825, // Latitude of initial map position
          longitude: -122.4324, // Longitude of initial map position
          latitudeDelta: 0.0922, // Amount of zoom on the map (latitude)
          longitudeDelta: 0.0421, // Amount of zoom on the map (longitude)
        }}
      />
    </View>
  );
}
To specify the map's initial position and zoom level, we set the initialRegion attribute. The following factors define the region:
longitudeandlatitude: The coordinates of the map's center.latitudeDeltaandlongitudeDelta: The zoom level is adjusted by these variables. Greater values zoom out, and smaller ones zoom in.
A map with the coordinates you enter will appear when this code is executed. In this instance, it is centered around a San Francisco locale.
Step 4: Adding Markers
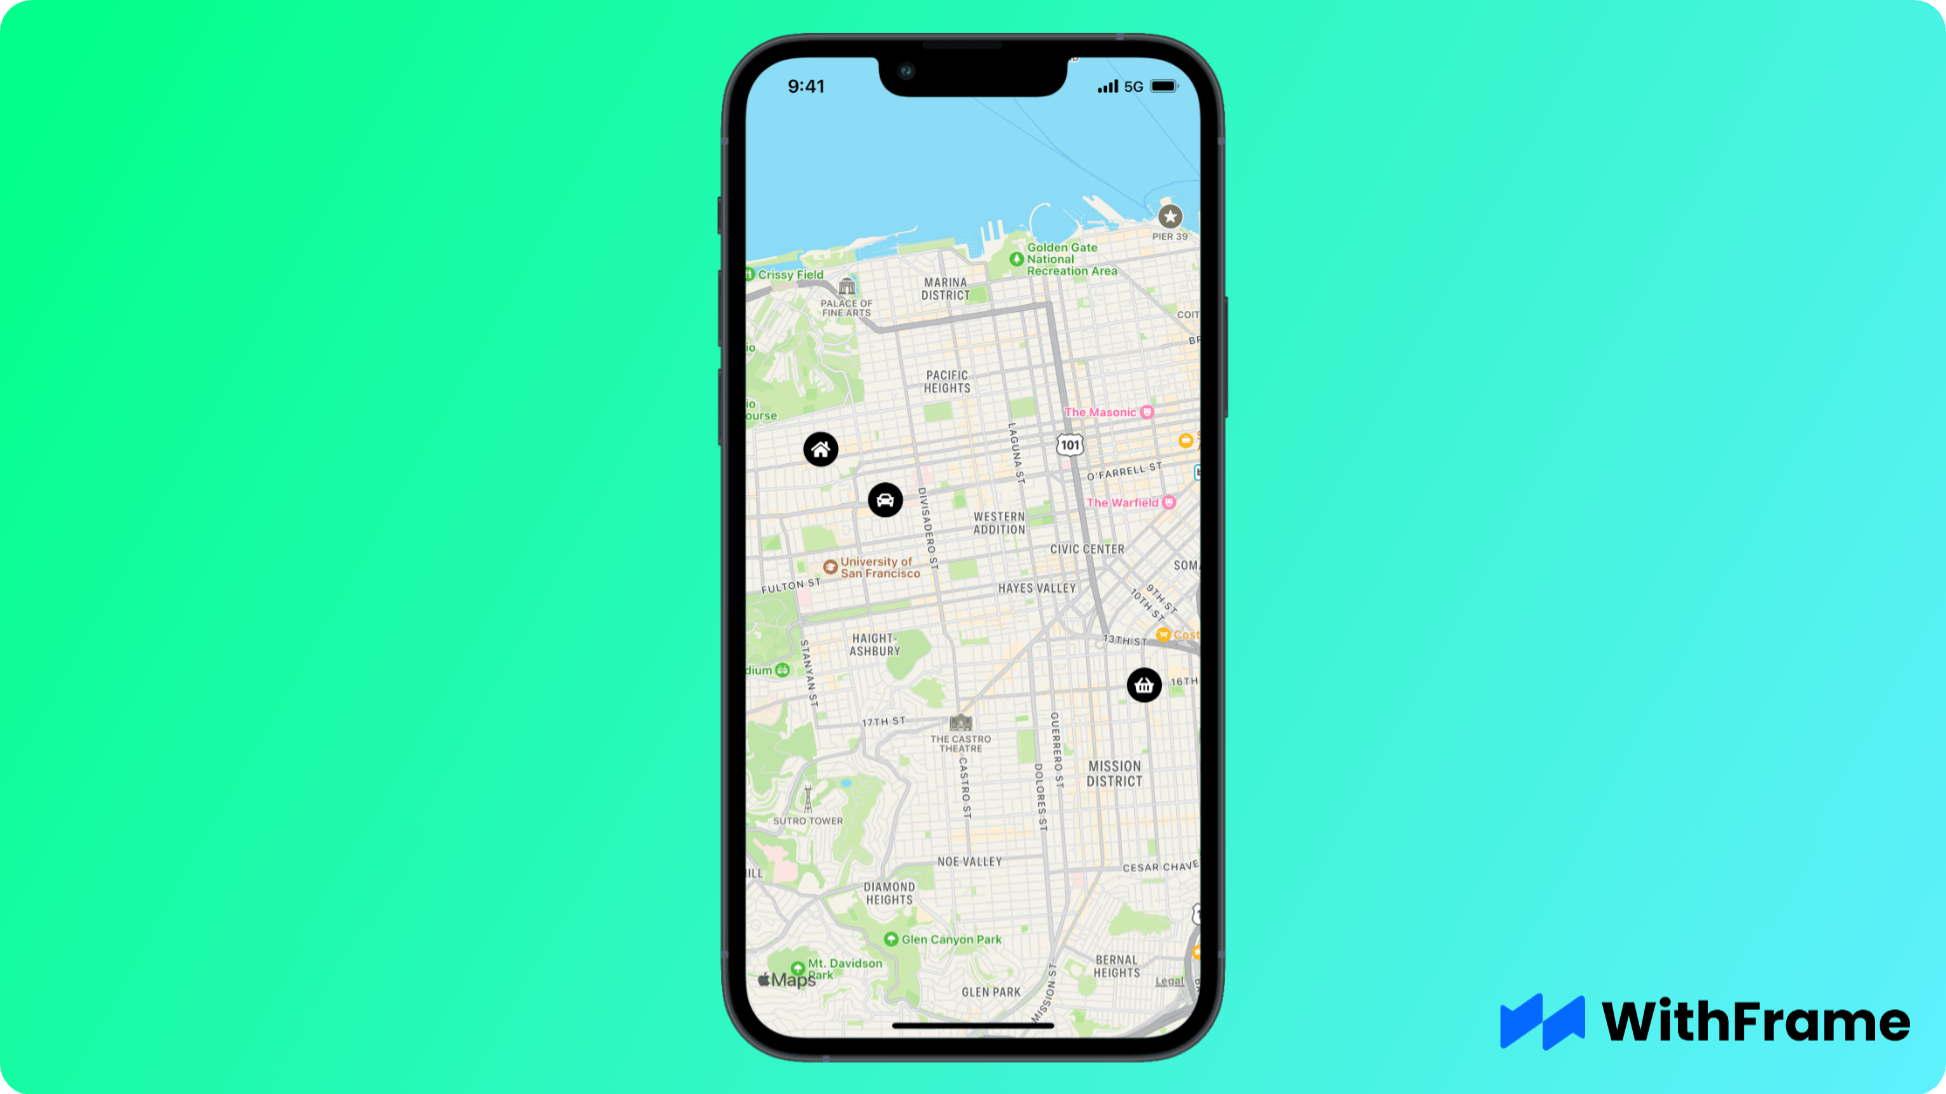
To draw attention to particular places on the map, markers are necessary. Markers aid users in readily identifying locales, whether you're showing them their current position or areas of interest.

Use the Marker component from react-native-maps to add a marker to the map:
import React from "react";
import { StyleSheet, View } from "react-native";
import FontAwesome from 'react-native-vector-icons/FontAwesome5';
import MapView, { Marker } from "react-native-maps";

export default function App() {
  return (
    <View style={{flex: 1}}>
      <MapView
        style={{flex: 1}}
        initialRegion={{
          latitude: 37.77839885,
          longitude: -122.433519,
          latitudeDelta: 0.0922,
          longitudeDelta: 0.0421,
        }}>
        {/* Store */}
        <Marker coordinate={{ latitude: 37.76546039999999, longitude: -122.4131604 }}>
          <View style={styles.marker}>
            <FontAwesome name="shopping-basket" color="#fff" size={15} />
          </View>
        </Marker>

        {/* Home */}
        <Marker coordinate={{ latitude: 37.7876254, longitude: -122.4515168 }}>
          <View style={styles.marker}>
            <FontAwesome name="home" color="#fff" size={15} />
          </View>
        </Marker>

        {/* Car */}
        <Marker coordinate={{ latitude: 37.7828469, longitude: -122.4438805 }}>
          <View style={styles.marker}>
            <FontAwesome name="car" color="#fff" size={15} />
          </View>
        </Marker>
      </MapView>
    </View>
  );
}

const styles = StyleSheet.create({
  marker: {
    width: 30,
    height: 30,
    backgroundColor: '#000',
    borderRadius: 9999,
    alignItems: 'center',
    justifyContent: 'center',
  }
});
Step 5: Adding Directions
In order to draw a direction line you have to know the coordinate points between the origin and the destination.

Use the Polyline component from react-native-maps to draw a line in the map, like this:
import React from "react";
import { StyleSheet, View } from "react-native";
import MapView, { Marker, Polyline } from "react-native-maps";
import FontAwesome from 'react-native-vector-icons/FontAwesome5';

const coordinates = [
  { latitude: 37.77396960000001, longitude: -122.4207761 },
  { latitude: 37.7854876, longitude: -122.4230498 },
  { latitude: 37.7821943, longitude: -122.4501325 },
  { latitude: 37.7844931, longitude: -122.4501513 },
];

export default function App() {
  return (
    <View style={{flex: 1}}>
      <MapView
        style={{flex: 1}}
        initialRegion={{
          latitude: 37.77839885,
          longitude: -122.433519,
          latitudeDelta: 0.0922,
          longitudeDelta: 0.0421,
        }}>
        {/* Store */}
        <Marker coordinate={coordinates[0]}>
          <View style={styles.marker}>
            <FontAwesome name="shopping-basket" color="#fff" size={15} />
          </View>
        </Marker>

        {/* Home */}
        <Marker coordinate={coordinates[coordinates.length - 1]}>
          <View style={styles.marker}>
            <FontAwesome name="home" color="#fff" size={15} />
          </View>
        </Marker>

        {/* Car */}
        <Marker coordinate={coordinates[1]}>
          <View style={styles.marker}>
            <FontAwesome name="car" color="#fff" size={15} />
          </View>
        </Marker>

        <Polyline
          coordinates={coordinates}
          strokeColor="#000"
          strokeWidth={3}
        />
      </MapView>
    </View>
  );
}
In this instance, the center of the map's coordinates has a marker put to it. You can add labels and information that will be displayed when the user taps on the marker by using the title and description properties.
Step 6: Customizing the Map
The map can be further customized by modifying its controls, functionality, and appearance. These are a few typical modifications: Modify the type of map: The map displays the standard view by default. Using the mapType prop, you can alter this to satellite, terrain, or hybrid:
import React from "react";
import { StyleSheet, View, Image } from "react-native";
import MapView, { Marker, Polygon } from "react-native-maps";

// Coordinates for a polygon
const polygonCoordinates = [
  { latitude: 37.8025259, longitude: -122.4351431 },
  { latitude: 37.7896386, longitude: -122.421646 },
  { latitude: 37.7665248, longitude: -122.4161628 },
  { latitude: 37.7734153, longitude: -122.4577787 },
];

export default function Example() {
  return (
    <MapView
      style={styles.map}
      initialRegion={{
        latitude: 37.78825,
        longitude: -122.4324,
        latitudeDelta: 0.0922,
        longitudeDelta: 0.0421,
      }}
      customMapStyle={mapStyle} // Applying custom map style
      showsUserLocation={true} // Show user location
      showsCompass={true} // Show compass on the map
      zoomEnabled={true} // Allow zooming
      zoomControlEnabled={true} // Show zoom controls (Android)
      minZoomLevel={5} // Set minimum zoom level
      maxZoomLevel={20} // Set maximum zoom level
    >
      <Marker
        coordinate={{ latitude: 37.78825, longitude: -122.4324 }}
        title="Custom Marker"
        description="This is a custom marker"
      >
        <Image
          source={require("./assets/custom-marker.png")}
          style={{ width: 40, height: 40 }}
        />
      </Marker>

      {/* Polygon on the map */}
      <Polygon
        coordinates={polygonCoordinates}
        strokeColor="#FF0000"
        fillColor="rgba(255,0,0,0.3)"
        strokeWidth={3}
      />
    </MapView>
  );
}
Add polygons or polylines: You can use components like Polygon or Polyline: to show custom shapes or paths on the map.
Step 6: Handling User Interaction
React Native allows maps to support user activities like zooming, dragging, and tapping. You should keep an ear out for the following important events:
onPress: released at the user's touch on the map. This event lets you work with the map and add markers.onRegionChange: triggered when the user zooms in or out, for example, or when the visible area of the map changes.onMarkerPress: fired when a marker is pressed, giving you the ability to take action depending on the marker that has been chosen.
Step 7: Best Practices for Using Maps in React Native
When incorporating maps into your React Native application, bear the following best practices in mind:
Optimize for Performance: Maps may require a lot of resources. Pay attention to performance, particularly when working with a lot of shapes, markers, or real-time location monitoring.
Managing Permissions: Permission is needed to access the user's location. Make sure to use libraries like react-native-permissions to manage location permissions appropriately in both iOS and Android.
Apply Clustering to Several Markers: To lessen map clutter if you have a lot of markers, utilize clustering to put them together at various zoom levels.
Conclusion
The potential for location-based features in React Native apps is endless when maps are integrated into the app. You can quickly add maps and markers to your app with the react-native-maps library, and you can even modify them to suit your needs.