What is SVG?
A Scalable Vector Graphic (SVG) is an XML-based image format. It works well for defining two-dimensional vector graphics. SVGs ease the pain of embedding images by giving you easy-to-zoom visuals. They are perfect for mobile apps because of the following reasons:
- Resolution independence: Because SVGs exist due to mathematics, they are high-quality vectors.
- Text elements: Since SVGs have text formatting, they are easy for people and search engines to read.
- Interactive animation: Supports dynamic graphics using CSS and JavaScript.
- Compatibility: Works with all modern web browsers and mobile applications.
Prerequisites
Before you begin, ensure your React Native environment is ready. When starting from scratch, load the following command:
npx react-native init MySvgApp
For existing projects, ensure your dependencies are up-to-date to avoid compatibility issues.
Installation
Let's go through how to install and use SVGs in React Native.
React Native requires additional setup for SVG support. So, you must install a third-party library called react-native-svg.
You can run one of the following commands according to your package manager:
npm install react-native-svg
Or, if you are using yarn package manager:
yarn add react-native-svg
Lastly, we have to link the native packages:
npx pod-install
In React Native 0.60+ the CLI autolink feature links the module while building the app.
What Can react-native-svg Do?
This library is a full suite of SVG components that includes Circle, Rect, Path, Polygon, Line, Symbol, Mask, Pattern, TextPath, etc.
react-native-svg library also supports both linear and radial gradients.
Using SVGs in React Native
After installing the package, we can import SVG components from the react-native-svg library and render SVG them in your React Native application.
For this first example we'll be using Circle and Rect SVG elements as well as the main root Svg component.
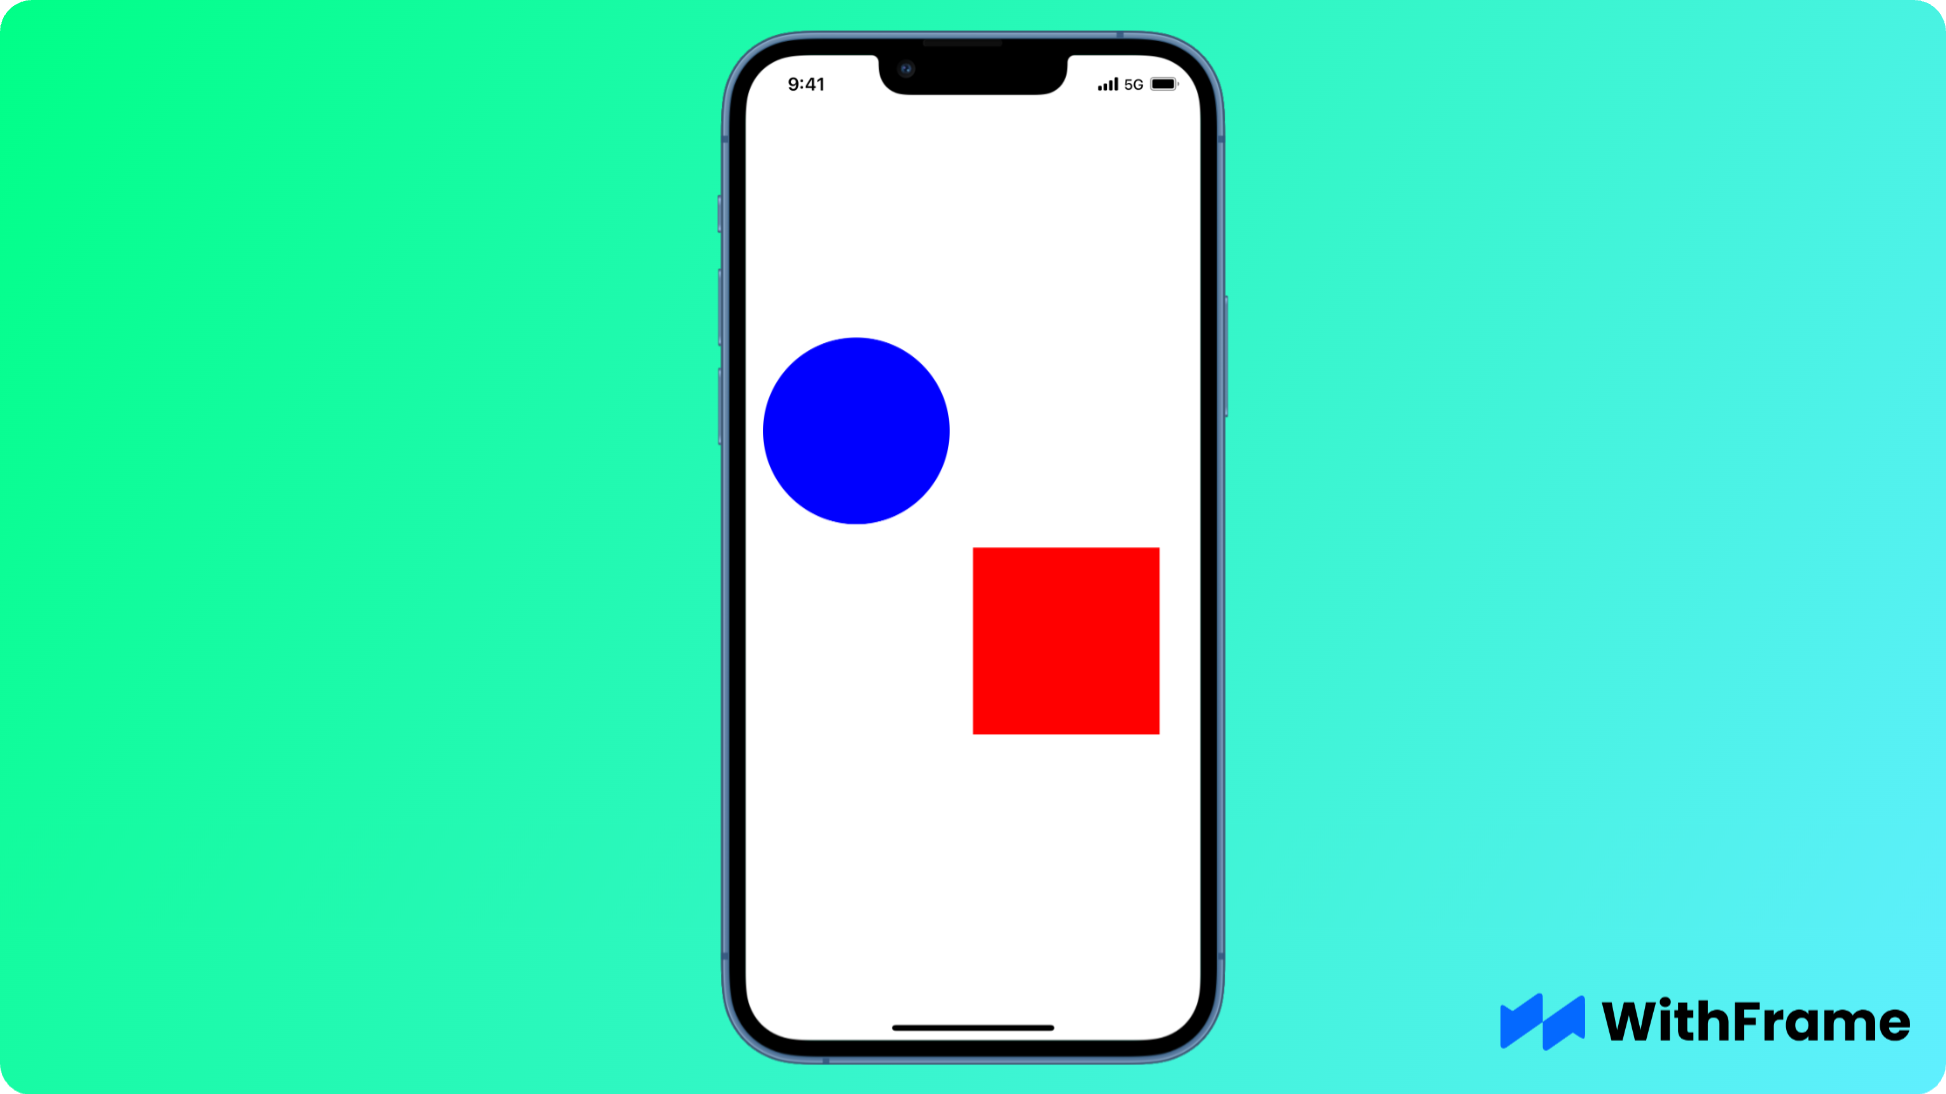
Here is a simple example of rendering a circle and rectangle:
import React from "react";
import { View } from "react-native";
import Svg, { Circle, Rect } from "react-native-svg";

export default function Example() {
  return (
    <View style={{ flex: 1, alignItems: "center", justifyContent: "center" }}>
      <Svg height="400" width="400">
        <Circle cx="100" cy="100" r="80" fill="blue" />
        <Rect x="200" y="200" width="160" height="160" fill="red" />
      </Svg>
    </View>
  );
}
In the above code:
- Inside the component, we use the
Svgcomponent to create an SVG container with a height and width of 400 units. - We use the
Circlecomponent to draw a blue circle with a center at(100, 100)and a radius of80units. - We use the
Rectcomponent to draw a red rectangle with coordinates(200, 200)and dimensionswidth="160"andheight="160"units. - The
fillattribute sets the color for the SVG elements.
What are SVG Attributes?
SVGs comprise of the following elements:
cxandcy: Center point of the Circle.r: Radius of the Circle.xandy: Coordinates of the top-left corner of the Rect.widthandheight: Dimensions of the Rect.fill: Colors SVG elements.
How to Apply Gradients in SVG Elements
After importing SVG elements, you can enhance visual effects like gradients for styling.
How Do I Add linear Gradients to SVG Elements in React Native?
In addition to basic shapes like circles and rectangles, SVGs also support gradients. By using LinearGradient , you can shade in shapes with gradients.
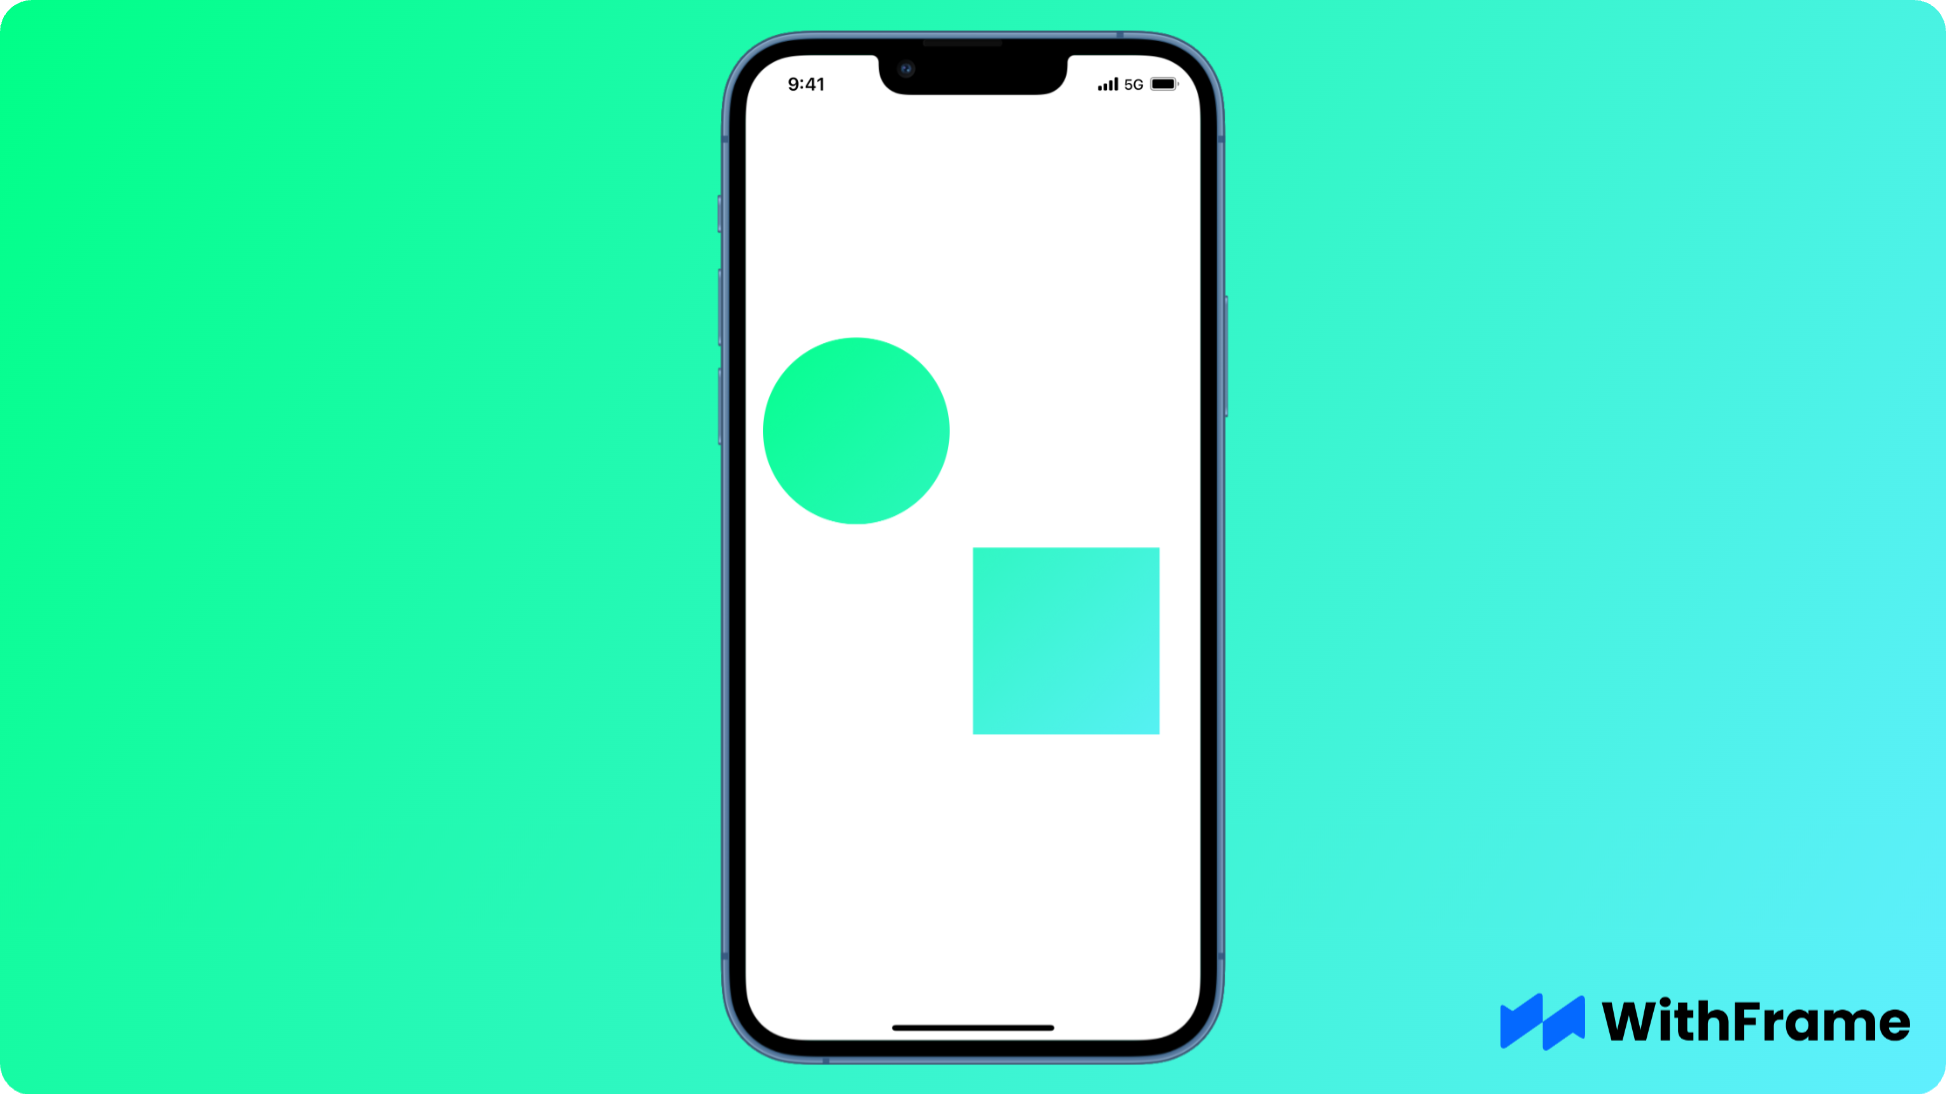
Below is an example of how to use LinearGradient for background:
import React from "react";
import { View } from "react-native";
import Svg, { Circle, Rect, LinearGradient, Stop } from "react-native-svg";

export default function Example() {
  return (
    <View style={{ flex: 1, alignItems: "center", justifyContent: "center" }}>
      <Svg height="400" width="400">
        <Circle cx="100" cy="100" r="80" fill="url(#linear_1)" />
        <Rect x="200" y="200" width="160" height="160" fill="url(#linear_1)" />

        <LinearGradient
          id="linear_1"
          x1="0"
          y1="0"
          x2="400"
          y2="400"
          gradientUnits="userSpaceOnUse"
        >
          <Stop stopColor="rgb(0, 255, 135)" />
          <Stop offset="1" stopColor="rgb(96, 239, 255)" stopOpacity="1" />
        </LinearGradient>
      </Svg>
    </View>
  );
}
How to Render Svg File in React Native?
Svg files can be rendered in React Native components in two different ways:
Using the SvgXml
The simplest way to do this is to copy your SVG file into a local variable and then pass it into <SvgXml /> component.

Don't forget to set both width and height on your SVG component.
import React from "react";
import { View } from "react-native";
import { SvgXml } from "react-native-svg";

const xml = `
<svg viewBox="0 0 133 89">
  <defs>
    <polygon id="path-1" points="8.40684451e-05 0.437359162 132.216628 0.437359162 132.216628 88.94 8.40684451e-05 88.94"></polygon>
  </defs>
  <g id="Page-1" stroke="none" stroke-width="1" fill="none" fill-rule="evenodd">
    <g id="Group-3">
      <mask id="mask-2" fill="white">
        <use xlink:href="#path-1"></use>
      </mask>
      <g id="Clip-2"></g>
      <path d="M66.208,44.247 C66.667,43.978 66.978,43.822 67.261,43.626 C85.526,30.962 103.769,18.266 122.083,5.673 C123.947,4.391 126.327,4.044 128.636,4.337 C129.222,4.412 129.843,4.967 130.259,5.461 C131.397,6.811 132.018,8.414 132.04,10.192 C132.116,16.351 132.211,22.509 132.215,28.667 C132.224,40.506 132.196,52.346 132.123,64.185 C132.113,65.68 131.829,67.193 131.502,68.661 C131.236,69.855 130.315,70.538 129.08,70.286 C127.772,70.02 126.375,69.749 125.258,69.078 C121.458,66.793 117.75,64.354 114.042,61.918 C113.299,61.43 112.805,61.404 112.053,61.926 C99.944,70.349 87.814,78.743 75.676,87.125 C74.827,87.712 73.932,88.291 72.975,88.651 C69.849,89.827 66.678,87.92 66.222,84.607 C66.054,83.386 66.041,82.137 66.04,80.901 C66.035,69.301 66.048,57.703 66.053,46.103 C66.054,45.828 66.023,45.551 65.994,45.051 C64.711,45.856 63.511,46.543 62.378,47.329 C44.933,59.422 27.502,71.535 10.047,83.616 C8.943,84.379 7.748,85.14 6.48,85.516 C2.996,86.547 0.09,84.181 0.043,80.349 C-0.016,75.549 0.003,70.75 0.003,65.95 C0.004,51.75 0.01,37.551 0.026,23.352 C0.027,22.597 0.058,21.825 0.211,21.09 C0.641,19.03 2.152,18.156 4.149,18.797 C4.75,18.99 5.338,19.281 5.87,19.624 C9.229,21.788 12.592,23.946 15.91,26.172 C18.322,27.79 19.502,27.842 21.9,26.173 C32.99,18.454 44.075,10.728 55.174,3.023 C56.286,2.251 57.427,1.47 58.659,0.935 C62.144,-0.58 65.765,1.504 65.972,5.291 C66.202,9.519 66.121,13.764 66.128,18.002 C66.144,26.441 66.128,34.881 66.128,43.321 C66.128,43.557 66.167,43.792 66.208,44.247" id="Fill-1" fill="#0469FF" mask="url(#mask-2)"></path>
    </g>
  </g>
</svg>
`;

export default function Example() {
  return (
    <View style={{ flex: 1, alignItems: "center", justifyContent: "center" }}>
      <SvgXml xml={xml} height="150" width="150" />
    </View>
  );
}
Using the react-native-svg-transformer transformer
A better way to import SVG files into the React Native application would be to use the react-native-svg-transformer transformer to resolve all files with the .svg extension in your project.
First, install react-native-svg-transformer module by running:
npm install -D react-native-svg-transformer
Next, update your metro.config.js file to include react-native-svg-transformer as a babelTransformerPath, like shown below:
const { getDefaultConfig, mergeConfig } = require("@react-native/metro-config");

/**
 * Metro configuration
 * https://facebook.github.io/metro/docs/configuration
 *
 * @type {import('metro-config').MetroConfig}
 */
const config = {
  transformer: {
    babelTransformerPath: require.resolve("react-native-svg-transformer"),
  },
  resolver: {
    assetExts: assetExts.filter((ext) => ext !== "svg"),
    sourceExts: [...sourceExts, "svg"],
  },
};

module.exports = mergeConfig(getDefaultConfig(__dirname), config);
Lastly, simply import your .svg file into the React Native application and render it as a normal component:
import Logo from "logo.svg";

export default function Example() {
  return (
    <View style={{ flex: 1, alignItems: "center", justifyContent: "center" }}>
      <Logo height="150" width="150" />
    </View>
  );
}
What are the Top Advantages of Using SVGs In React Native?
Before diving in too deep, we break down how their specifications work.
How Can You Scale SVGs in React Native?
Scalability ranks high as the top benefit of using SVGs in React Native. They are vector-based. They can be resized or zoomed and still retain image quality.
Why Use Vector-based Images in React Native Apps?
Vector-based images like SVGs rely on mathematical paths. That means their resolution remains sharp regardless of size. That differs from pixelated images, which can blur when scaled.
How Does Using SVGs Reduce App Load Times?
SVGs are light. That expedites loading compared to other media and optimizes responsiveness.
Can SVGs in React Native Be Interactive or Animated?
Yes, SVGs boost interactive animation, facilitating dynamic usability. You can apply:
- Hover effects
- Transitions
- Other CSS-like styling
Are SVGs accessible in mobile apps?
SVGs are accessible by default. They contain readable text elements. That makes them a good choice for improving accessibility.
Conclusion
As you continue to explore the capabilities of SVGs and the react-native-svg library, you'll discover a wealth of features and functionalities that can help you create dynamic and interactive user interfaces for your mobile applications.
Integrating SVGs into React Native improves mobile applications. With react-native-svg, you can access high-quality features and functionalities. That is easily the most vital skill for developing applications in the future.